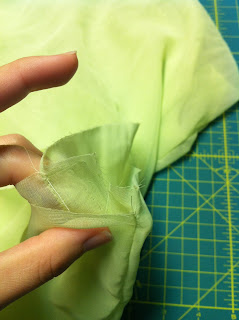
I tried to minimize the seams and raw edges as much as possible since this was my first time working with this material and it was super shifty.
If this is your first time working with chiffon, think of it as a crazy criminal. If it can get away... it will. :)
Supplies
1 3/4 yd of nylon chiffon... I cut mine down to 56" x 56" (the bolt was 60" wide), so make sure that your bolt is wide enough, or you may need to make adjustments to the steps.
3/4" elastic
Long scrap of material for waistband. At least 4" wide and long enough to go around your child with room to spare
Bow embellishment and hand-sewing needle (optional)
Measuring tape
Acrylic ruler
Rotary cutter
Matching thread for chiffon and waistband.
Safety pin
Step 1- Measure around your child's waist and write down the measurement.
Step 2- Cut your chiffon. For a 2T skirt with a little bit of gather but not too crazy, I cut a 56" x 56" square. It's going to look huge, but we're going to be folding and gathering later, so no worries. Make sure you don't have any selvedges on there. If so, just trim them off, taking care to keep it as straight as possible.
 |
| Measure and cut. Trim off selvedge. |
Step 3- With right sides together, pin two opposite edges and sew a seam 1/2" away from the edge. Backstitch a few stitches at the start and finish of the seam.
 |
| Pin and sew seam 1/2" from edge |
Step 4- Now you should have a chiffon "tube" with the seam on the outside.
4a.) Grab the seam at the bottom and fold the tube up so it is now doubled on itself with the wrong sides together, right sides out.
 |
| 4a- Lining up the seams, wrong sides together |
4b.) Fold one more time, folding the tube in half along the seamline. Be careful to make sure that all the layers are folding evenly. This step may include a few mumbles and grumbles. It took me about 3 tries to get everything folded evenly and without slippage. Chiffon is a tricky little sucker. Be patient.
 |
| 4b- Folded up twice. Raw edges on left, right side folded |
Step 5- Pin like crazy. Pin all around the front, and all around the back. I wanted to minimize shifting, so once the front was pinned, I just flipped it back and pinned the back from the inside. Once it is pinned and you are sure the layers haven't shifted too much, trim the top to make it even. Just trim a little, if you're trimming off inches and inches, you're going to end up with a Britney Spear's length skirt. Not cool.
 |
| Pinned and Trimmed |
Once pinned, stitch around the top, slightly less than 1/2" from the raw edges, all around the tube. Then, baste directly below the stitchline for gathering. (No need to gather yet, but when you do, just pull the bottom thread on your basting stitch.)
Step 6- Cut your waistband. Make the strip 4" wide and a few inches wider than your child's waist measurement. My daughter's waist measured 18" and I cut the strip 22" long. Gives it a little wiggle room for slipping it on.
With right sides of your waistband together, sew down the short end (backstitch at beginning and end) 1/2" from the raw edge. Press seam open.
 |
| Align short ends and sew 1/2" from edge. |
Step 7-
a.) Gather your chiffon skirt so the top will fit your waistband.
 |
| Gathering |
b) Pin like you mean it. Pin right sides together. Match up side seams.
c.)Then, sew from the chiffon side (easier to manipulate fabric), making sure that your stitching falls below your previous stitches so they'll be covered later.
Step 8- Fold unattached edge of waistband back 1/2" to the wrong side and press. Push waistband back down and CAREFULLY trim off excess bulk from where you attached the waistband in Step 7c. Remember, don't cut too much or too close to the seam. You're just removing extra "fluff" from the waistband so it's not bulky or poofy later. I wouldn't cut past the original stitch line you made in Step 5.
Step 9- Now, fold waistband over to the back, making sure that the lip you ironed in Step 8 is folded up underneath so no raw edges show. Also, make sure that the waistband is far enough down to cover your previous stitchline. Pin in place.
Looking at the photo above, my skirt is inside-out. I pin it that way so that I can make sure the stitching is covered on the inside when it is flipped. Just easier for me.
Step 10- Flip right-side out and topstitch all the way around (close to the edge) until you get about 1 1/2" from where you started stitching. Make sure to backstitch at the beginning and end, leaving a 1.5" gap to insert your elastic. The gap should be on the inside part of your skirt.
Step 11- Cut a piece of elastic that is the same size as your child's waist measurement. (When cutting the elastic, do not stretch it. Just lay it flat.) Thread it all the way through the waistband through the gap you left.
To finish, make sure that elastic is completely inside the waistband and stitch the opening closed. Hand-sew on bow embellishment and enjoy!


No comments:
Post a Comment