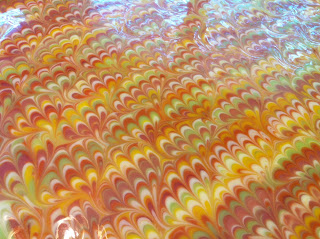
I love soap challenges! Anything that gives me an excuse to break out with my soaping oils and spatulas is a GOOD thing. That's why, I was super excited to hear that the new Great Cakes Soapworks Soap Challenge Club's challenge was the…
*DRUM ROLL*
TAIWAN SWIRL!!!!
Never heard of the Taiwan Swirl? You will LOVE it. It's easy to do, yet makes a remarkable bar of soap that looks like it took ages to create.
For my SCC (That's "Soap Club Challenge") soap, I went with a CK-One dupe fragrance oil. It had great reviews, reminded me of being a preteen, and was a slow-moving fragrance. All of these great attributes made it the PERFECT fragrance oil for what I was trying to do. I figured that a clean, refreshing palette of crisp white, bright blue, and black would do this unisex fragrance justice. I love the results.
Want to see how I did it? No worries! I made a video! ;)
Showing posts with label soap. Show all posts
Showing posts with label soap. Show all posts
Wednesday, January 15, 2014
Tuesday, January 7, 2014
Vanilla Goat's Milk Soap
I've been playing with additives in my soap. With this one, I went a little overboard, but totally in a good way. First, I knew that I wanted to use egg yolks. Egg yolks are supposed to up the lather, and I've also heard that the fat in the yolk is super conditioning to the skin. I wanted a super gentle, super conditioning soap, so I decided….
1.) Goat's Milk- Conditioning, great for sensitive skin.
2.) Egg yolks- Also conditioning, said to reduce redness and give SUPER LATHER!
3.) Avocado puree- Wait, what?
Yup, avocado puree. I was playing with my food processor and made a great avocado puree. I made so much, though, that I froze the extra in individual cubes to save and toss in soaps that I thought would benefit from it. Since I knew this soap was going to be dark (from the vanillin in the Vanilla fragrance oil), I figured, "Why not?"
So on to the avocado puree on the list…
3.) Avocado puree- ALSO gives great lather, and avocado is rich in vitamins A, D, and E… as well as containing a whopping amount of potassium, which helps the goodies penetrate deep into the skin. Score!
4.) Organic honey- antimicrobial, it's a humectant (attracts moisture and helps retain it), contains antioxidants AND, I thought it would go well with the whole goat's milk/vanilla theme. Who DOESN'T like vanilla and honey? If you raised your hand, I'm watching you… there's something weird about you. ;)
5.) Three kinds of butters. WHOOP! Okay, so it's cold outside and that means that it's prime dry-skin weather. I wanted to load on the butters. So I added cocoa, shea, and mango. If you've never used mango, it's phenomenal… try it.
So enough of my rambling, you're probably wondering what it looks like.
The photo on the left is how it looked when I put it in the mold. The photo on the right is the end product. All prettied up and ready to start curing. It takes about 3 days after cutting for it to discolor to this point. I had planned on it discoloring, so I left it completely plain and embraced the chocolate-y beauty of it. THIS is why you always have to take vanillin into consideration when designing your soaps. My vanilla fragrance is from Bramble Berry. It smells wonderful!
Excited to see how this one turns out.
Monday, June 10, 2013
Great Cakes Soapworks Peacock Swirl Challenge
Amy Warden of Great Cakes Soapworks started a Soap Challenge Club and the first technique was the Peacock Swirl. I had never tried this before, so I decided to give it a whirl.
Rainbow Sherbert Peacock was born! This soap is scented with Rainbow Sherbert fragrance oil from Nature's Garden, and it smells good enough to eat!
Okay, now the process....
First, I had to get all of my supplies together:
I used micas and titanium dioxide from The Conservatorie to color my soap. The marbling rake was made using curler picks and a piece of cardboard. I liked the look of a tightly swirled peacock swirl, so I spaced mine closer together. :)
I mixed up a slow-moving soap recipe to give myself time to work with the swirl, lined a pizza box (I wanted a lot of room to work), and then got all of my colors into my squeeze bottles. Poured the majority of my soap batter (colored with TD) into the box, and then took a deep breath...
It was time to start squeezing and marbling. I went crazy with the colors, but also squirted some white to help define the swirls.
Above is a picture before using the rake and doing the "S" swirls...
And now (above) here is the photo AFTER swirling. I am now SUCH a fan of this technique and really can't wait to try it again!
After a day of drying, it was ready to cut and shoot.
Hungry? ;)
Labels:
cold,
handcrafted,
handmade,
mica,
peacock,
process,
soap,
swirl,
titanium dioxide
Subscribe to:
Posts (Atom)


